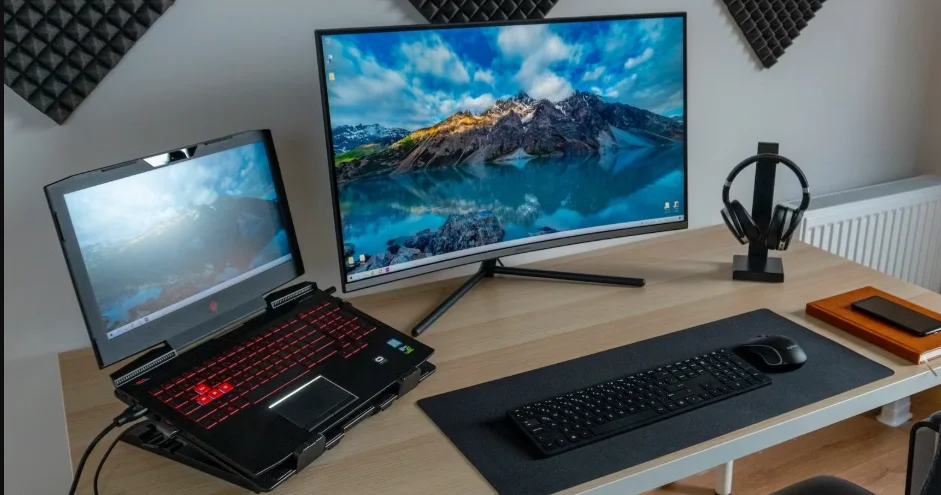
Connecting an external monitor to your Windows PC should be a plug-and-play process. But sometimes, instead of getting extra screen real estate, you’re met with screen flickers, blackouts—or worse, a full system crash. Whether you’re dealing with a BSOD (Blue Screen of Death) or a system freeze every time you plug in an HDMI or DisplayPort cable, this issue can severely impact your workflow.
Common Causes of Crashes When Connecting an External Monitor
Before diving into the fix, it’s important to understand what might be causing your system to crash.
| Potential Cause | Description |
|---|---|
| Outdated or corrupt graphics drivers | Incompatible GPU drivers can’t handle multi-display output. |
| Faulty or incompatible monitor cables | Damaged or low-quality HDMI/DP cables may trigger display signal issues. |
| Incorrect refresh rate or resolution | Monitors running outside their supported specs may cause the system to panic. |
| Display mode conflicts | Extended or duplicate modes may not initialize correctly on startup. |
| Windows update issues | Some updates disrupt display driver behavior. |
| BIOS or firmware bugs | Display output routing from BIOS level may misbehave. |
| GPU or docking station hardware faults | Physical issues with ports, adapters, or GPU hardware. |
Step-by-Step Troubleshooting and Fixes
Step 1: Check for Windows and Driver Updates
Start with the basics. Windows often releases patches for display-related issues, especially for hybrid graphics or high-resolution output problems.
How to Check:
- Go to Start > Settings > Windows Update.
- Click “Check for Updates.”
- Install all available updates.
- Reboot your system and test the external monitor again.
Step 2: Update or Roll Back Graphics Drivers
Faulty drivers are a top cause of crashes when using external displays.
Option A: Update Drivers
- Press Windows + X, select Device Manager.
- Expand Display adapters.
- Right-click your GPU, choose Update driver > Search automatically.
Alternatively, visit your GPU manufacturer’s website:
- Intel Graphics: https://www.intel.com/content/www/us/en/support.html
- NVIDIA: https://www.nvidia.com/Download/index.aspx
- AMD: https://www.amd.com/en/support
Option B: Roll Back Drivers (If Crashes Began After an Update)
- Device Manager > Display Adapters > [Your GPU].
- Right-click > Properties > Driver tab > Roll Back Driver.
Step 3: Use a Different Cable or Port
A common culprit is a faulty HDMI, DisplayPort, or USB-C cable. Swap it out with another one—even a brand-new cable can be defective.
Cable Considerations:
| Cable Type | Minimum Version Needed for Stability |
|---|---|
| HDMI | 1.4 or higher for 1080p; 2.0+ for 4K |
| DisplayPort | 1.2 for most uses; 1.4+ for high refresh |
| USB-C/Thunderbolt | Ensure the port supports video output |
Also, try using a different port on both your laptop and monitor, if available.
Step 4: Boot Into Safe Mode and Connect the Monitor
Safe Mode loads minimal drivers. If your system doesn’t crash here, the problem is likely driver or software-related.
To Boot into Safe Mode:
- Press Windows + R, type msconfig, hit Enter.
- Under the Boot tab, check Safe boot, select Minimal.
- Restart your PC.
- Try connecting the monitor.
If it works fine in Safe Mode, revert to normal mode and proceed to Step 5.
Step 5: Set the Display Mode Manually
Sometimes the automatic display mode causes confusion. Set it manually instead:
- Right-click on desktop > Display settings.
- Scroll to Multiple displays.
- Choose between Duplicate, Extend, or Second screen only.
- Click Apply.
If one mode causes a crash and another doesn’t, you’ve identified a software mismatch.
Step 6: Adjust Refresh Rate and Resolution
Incompatible refresh rates or resolutions are frequent triggers for display crashes.
How to Adjust:
- Go to Settings > System > Display.
- Click Advanced display settings.
- Select the external monitor.
- Choose a safe refresh rate (e.g., 60Hz) and native resolution.
If your external monitor supports 144Hz or higher, try reducing it to 60Hz and see if stability improves.
Step 7: Disable Hardware Acceleration in Key Apps
In rare cases, hardware acceleration in browsers or apps like Zoom or Teams can cause display driver crashes, especially during screen sharing or video playback.
Disable It in Google Chrome:
- Go to Settings > System.
- Toggle Use hardware acceleration when available off.
- Restart the browser.
Do this for other high-usage apps to isolate compatibility issues.
Step 8: Update BIOS and Chipset Drivers
BIOS updates often include display output or hardware compatibility improvements.
To Update BIOS:
- Identify your motherboard or laptop model.
- Visit the manufacturer’s website (e.g., Dell, HP, Lenovo, ASUS).
- Download the latest BIOS or firmware update.
- Follow instructions carefully—a failed BIOS update can brick your machine.
Also install chipset drivers from the same page, especially if you’re using integrated graphics.
Step 9: Test with Another Monitor or Adapter
To rule out hardware incompatibility:
- Try the same setup on another monitor.
- Use a different adapter (especially if using HDMI to VGA or USB-C to HDMI).
- Test on a different system if possible.
If the same issue occurs across setups, your GPU or cable may be faulty.
Quick Reference Table: Crash Scenarios and Fixes
| Crash Scenario | Suggested Fix |
|---|---|
| BSOD immediately after plugging monitor | Update GPU driver or change cable |
| Freeze when switching to duplicate mode | Use extend mode instead, reduce refresh rate |
| Monitor causes random reboots | Check power draw via docking station or USB-C hub |
| Monitor works in Safe Mode only | Disable or reinstall display drivers |
| No display + black screen after connection | Adjust resolution manually or rollback recent updates |
Final Tips
- Avoid generic USB-C hubs for video output—stick with brand-certified or Thunderbolt-certified ones.
- Use Windows Reliability Monitor (perfmon /rel) to see crash history linked to display changes.
- Keep monitor firmware updated, if applicable (some models from Dell, LG, and Samsung offer firmware tools).
- Don’t force hotplugging under heavy load (e.g., while gaming or rendering)—this can cause GPU crashes.
External monitor crashes on Windows are frustrating, especially when you’re expecting a seamless setup. The good news is that most problems stem from solvable issues like driver mismatches, display mode conflicts, or faulty cables. By working through the steps in this guide—from driver updates to resolution tuning and hardware swaps—you can usually isolate and fix the root cause.
With a stable dual-monitor setup, you’ll not only boost your productivity but also prevent the long-term wear and tear that frequent crashes can inflict on your system.